Hi, this is CoinFirstStep. This guide shows you how to move USDT from Spot to Futures in the Binance app, one screen at a time.
The short answer: tap Assets, then Transfer, set From to Spot and To to USDⓈ-M Futures, enter the amount and tap Confirm Transfer. The USDT then shows up under the Futures tab in Assets. Moving it back works on the same screen with the two wallets swapped.
20% commission rebate
Referral link: you get a 20% commission rebate on your trading fees (disclosure).
At a glance
| What you need | A verified Binance account, USDT in your Spot wallet, and a Futures account (a one-time setup) |
|---|---|
| Where | Binance app: Assets → Transfer |
| Direction | From Spot to USDⓈ-M Futures. Swap the two to move it back |
| Before your first trade | Pass the 14-question Futures quiz and check Cross or Isolated |
1. Before you transfer: Spot, Futures and your Futures account
Your Binance account has separate wallets. The Spot wallet is for buying and selling coins on the spot market, and Binance says you need to transfer funds from it to your Futures wallet before you can trade futures (How to transfer funds to the Futures wallet). My USDT deposit landed in Spot: its deposit record shows Deposit Wallet: Spot Account.
Futures come in two kinds:
USDⓈ-M Futures are settled in USDT or USDC. This is the wallet for your USDT.
COIN-M Futures are settled in the coin itself, such as BTC. (Binance FAQ on USDⓈ-M and COIN-M)
Binance's transfer guide linked above also says the two don't share a wallet, so choose USDⓈ-M Futures when you move USDT.
I usually trade futures with USDT, so USDⓈ-M is the one I use. Binance's comparison of the two gives these reasons for USDⓈ-M. Your profit and loss is counted in USDT, so you can read it in dollar terms. One settlement coin works across contracts, so you don't have to buy BTC or other coins first. And each contract is one unit of the coin, much like BTC/USDT on the spot market.
With COIN-M, your margin is the coin itself, so its dollar value also moves with the coin's price. Binance suggests COIN-M for miners and long-term holders who want to hedge coins they already own.
If you have never used Binance Futures, open your Futures account first. It's a one-time setup. Binance's steps are Futures → Open Account → choose your trading experience → accept the Binance Futures Service Agreement & Risk Acknowledgment → Open Now (How to open a Binance Futures account). A Binance guide from 2025 says you need to pass a quiz to activate futures (How to make your first trade on Binance Futures), and Binance showed me the quiz too.
Binance also requires identity verification before you can trade futures. If your account isn't verified yet, follow how to verify your identity (KYC) first, then come back here.
Futures aren't offered in every country. For example, Binance announced in 2021 that users in Germany, Italy and the Netherlands could no longer open new futures accounts (Binance announcement). If Binance won't let you open a Futures account, read the reason it gives and don't try to get around it.
Futures trading uses leverage, so losses can grow quickly, and Binance can close a position automatically (liquidation) when the price moves against you. You can lose the money you move into Futures. This is a how-to guide, not investment advice.
If you only plan to buy and hold coins, you don't need to move anything. Leave your USDT in Spot.
2. How to transfer USDT from Spot to Futures
Tap Assets at the bottom right, then the Spot tab at the top. Check that USDT appears in the Balance list (the arrow points to your Spot total).
(The order of the tabs changed between my screenshots, so look for each tab by its name.)
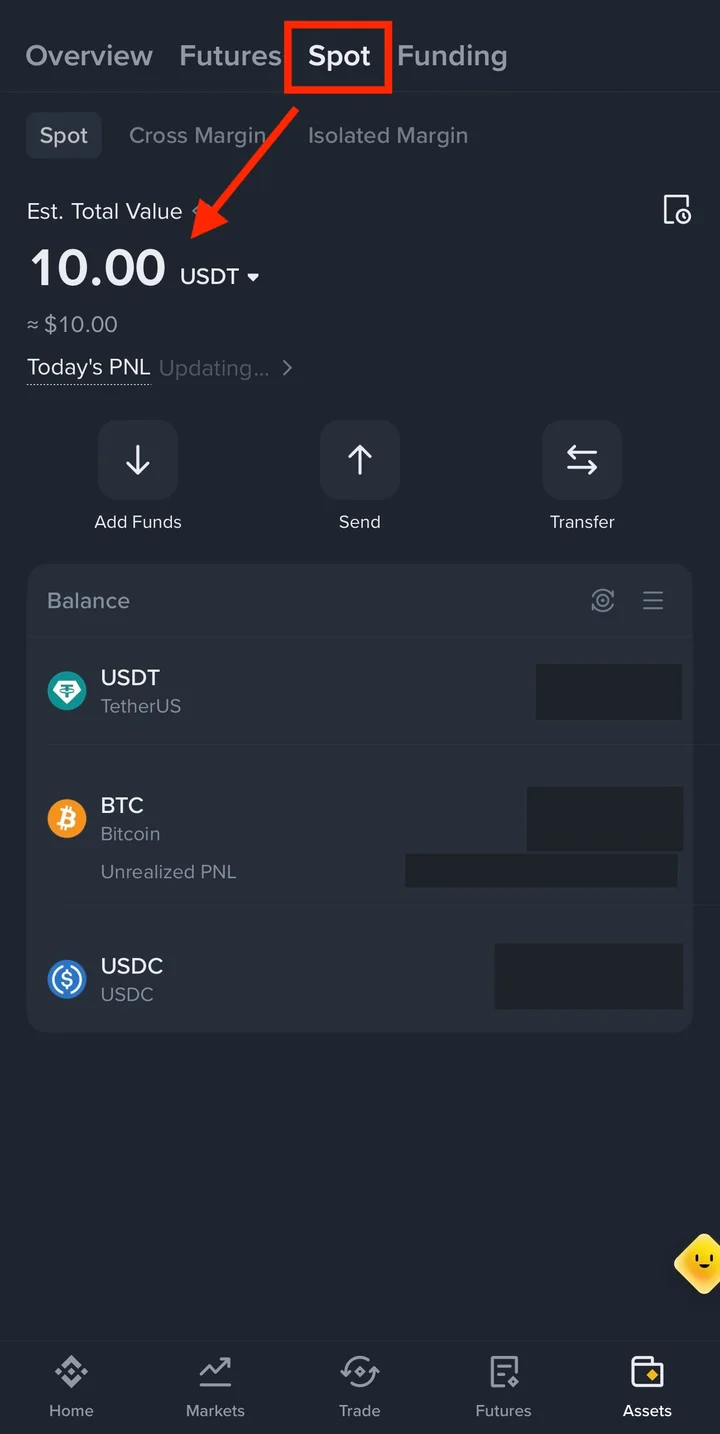
Tap Transfer. It's on the Spot tab and also on the Overview tab, shown here.
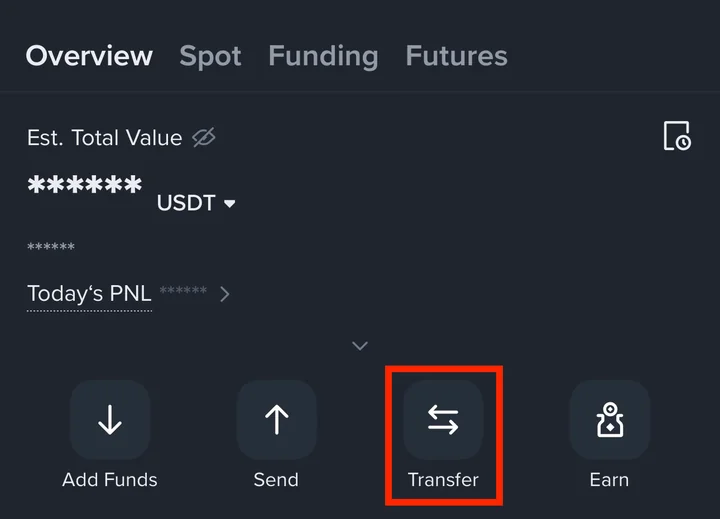
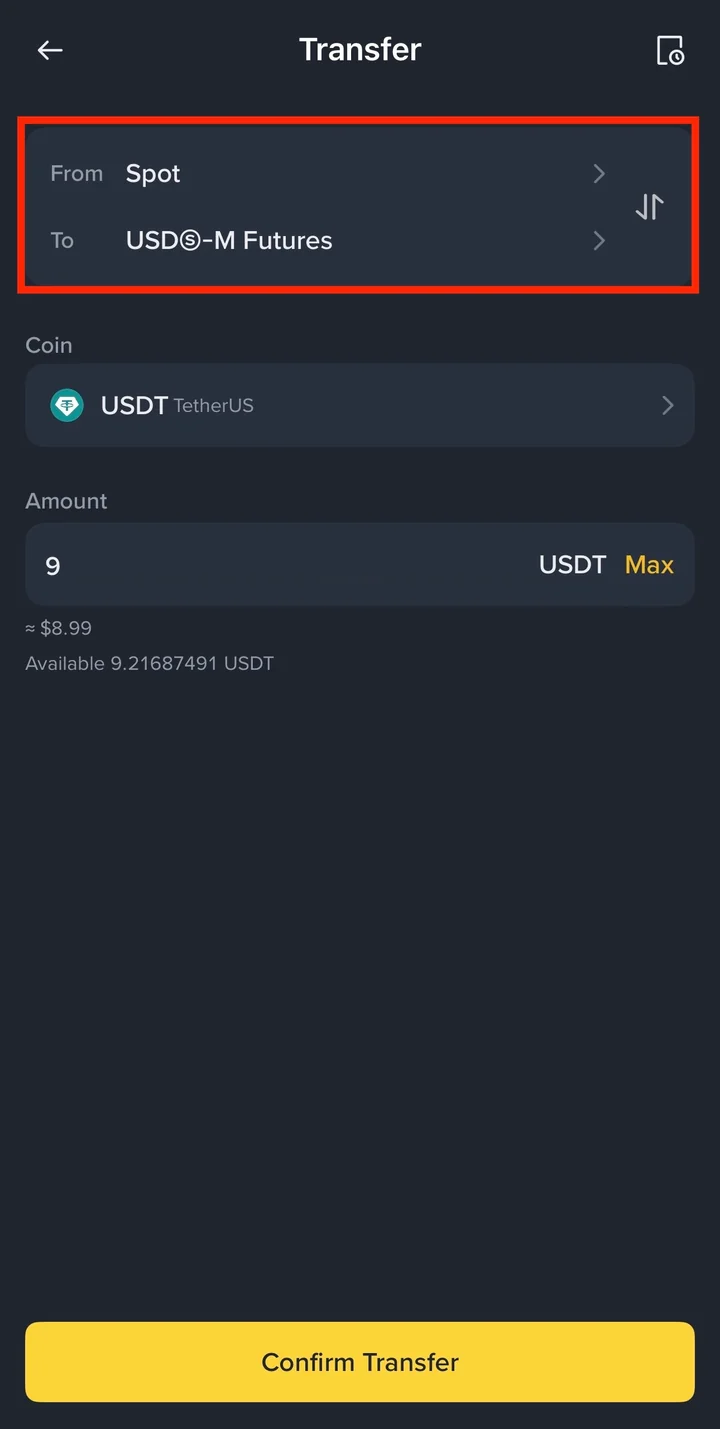
The Transfer screen has a From line and a To line. Tap From and choose Spot. Most wallets in this list show how much USDT they hold, so you can check your Spot balance here too.
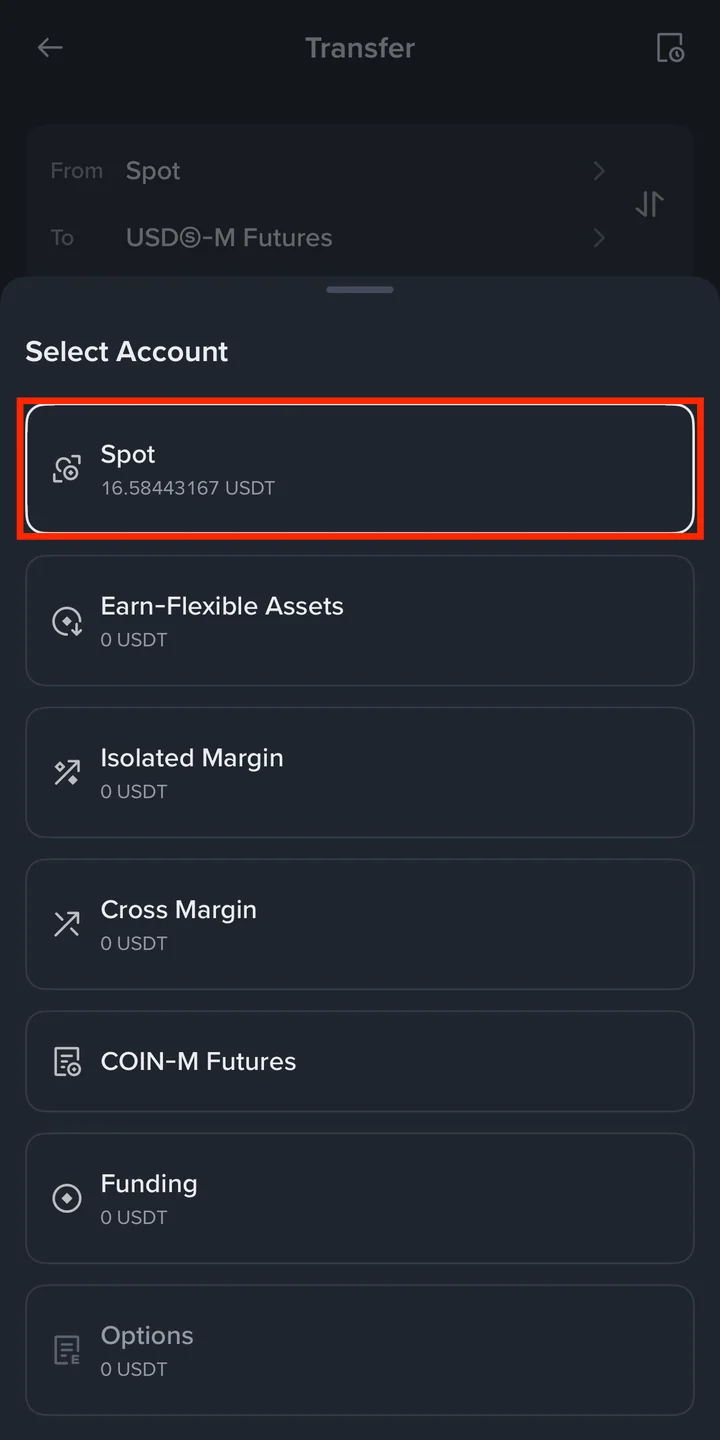
Tap To and choose USDⓈ-M Futures. COIN-M Futures sits right below it, so check the name before you tap.
The two lists weren't in the same order on my screen: Spot was at the top of the From list, and Cross Margin was at the top of the To list. Look for each wallet by its name, not its place.
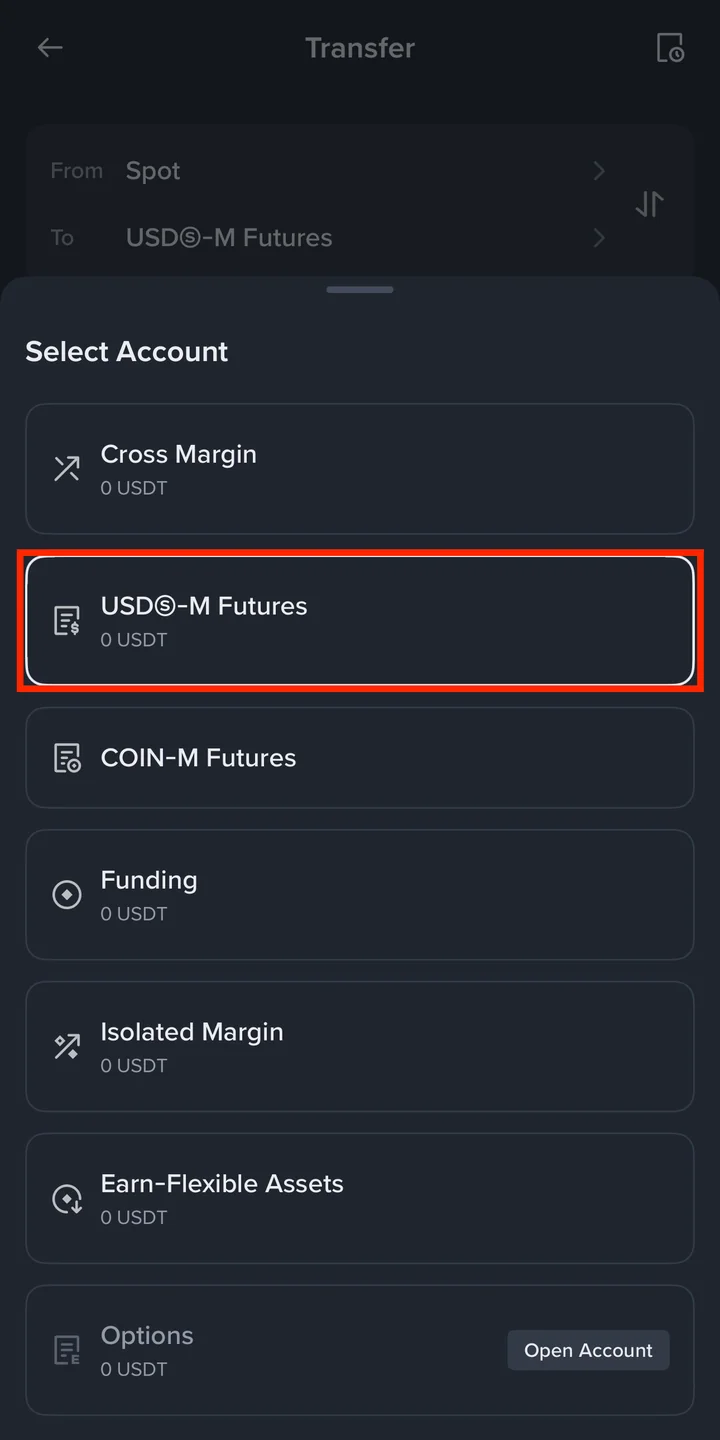
Check that Coin says USDT. Type the amount (Max fills in everything available), then tap Confirm Transfer.
Before you confirm, read the To line once more. It should say USDⓈ-M Futures, not COIN-M Futures. To change a wallet, tap its line.
My habit: I move only the amount I plan to use for that trade, not my whole Spot balance.
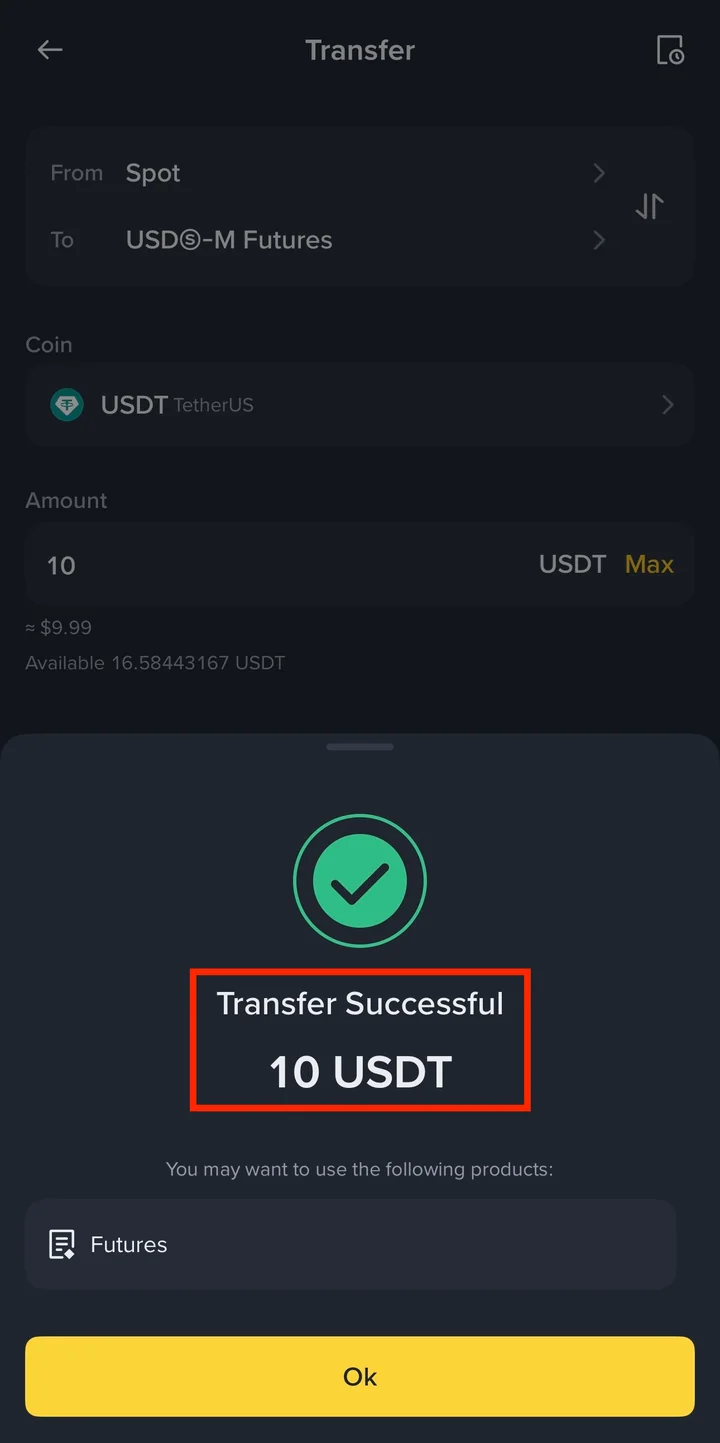
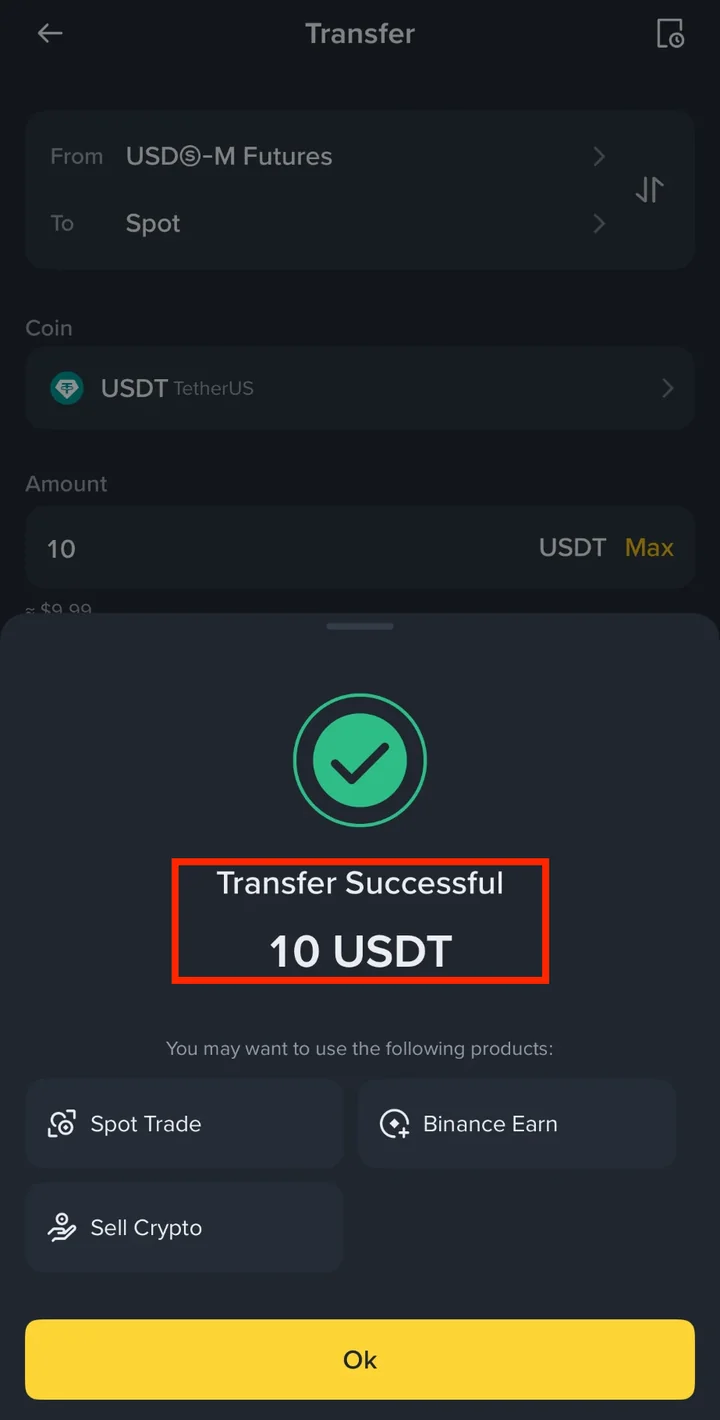
A Transfer Successful message shows the amount you moved. Tap Ok to close it. The Futures button above it is a product Binance suggests, and you don't need it to finish the transfer.
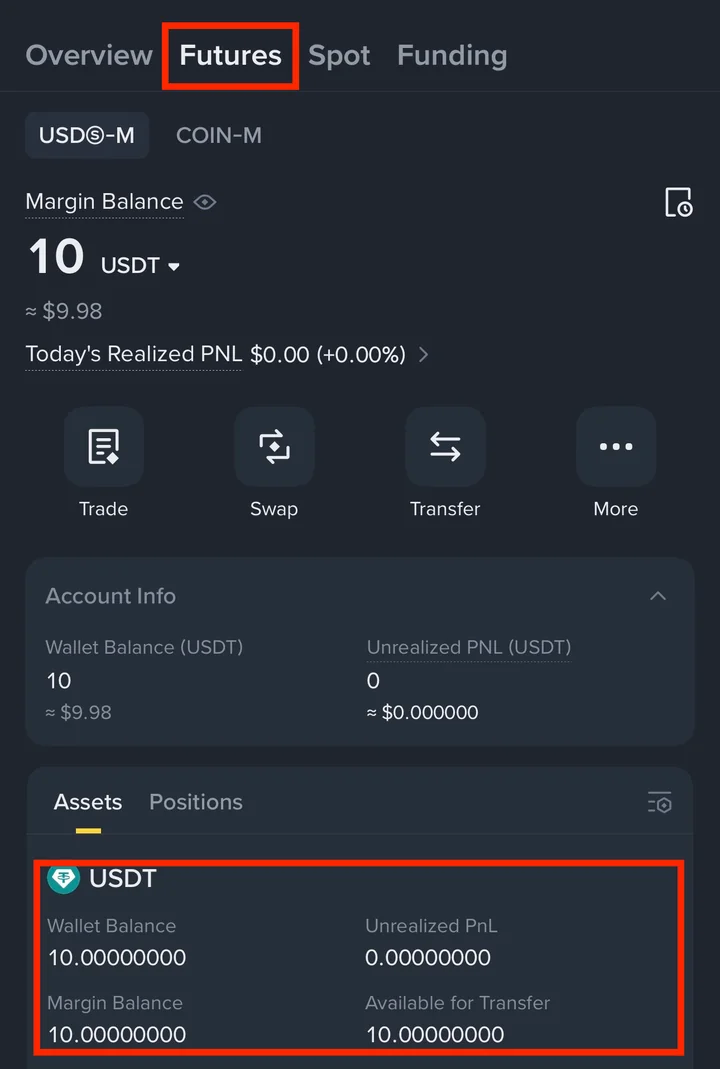
Back in Assets, open the Futures tab and make sure USDⓈ-M is selected. The USDT you moved shows as Margin Balance and Wallet Balance.
▣ If you can't find the USDT in Futures
Check that USDⓈ-M is selected at the top of the Futures tab, not COIN-M.
Still not there? Look for the transfer in your asset history (see 3-2 in section 3, Check your transfer history).
Nice work. Your USDT is now in your USDⓈ-M Futures wallet.
3. After the transfer: move it back, check the record, get ready to trade
3-1. Move USDT back from Futures to Spot
When you want the USDT back in Spot, for example to buy coins on the spot market, reverse the transfer.
In Assets, open the Futures tab and tap Transfer (not Swap) in the row of buttons under your balance. You can see it in the screenshot for STEP 7 in section 2.
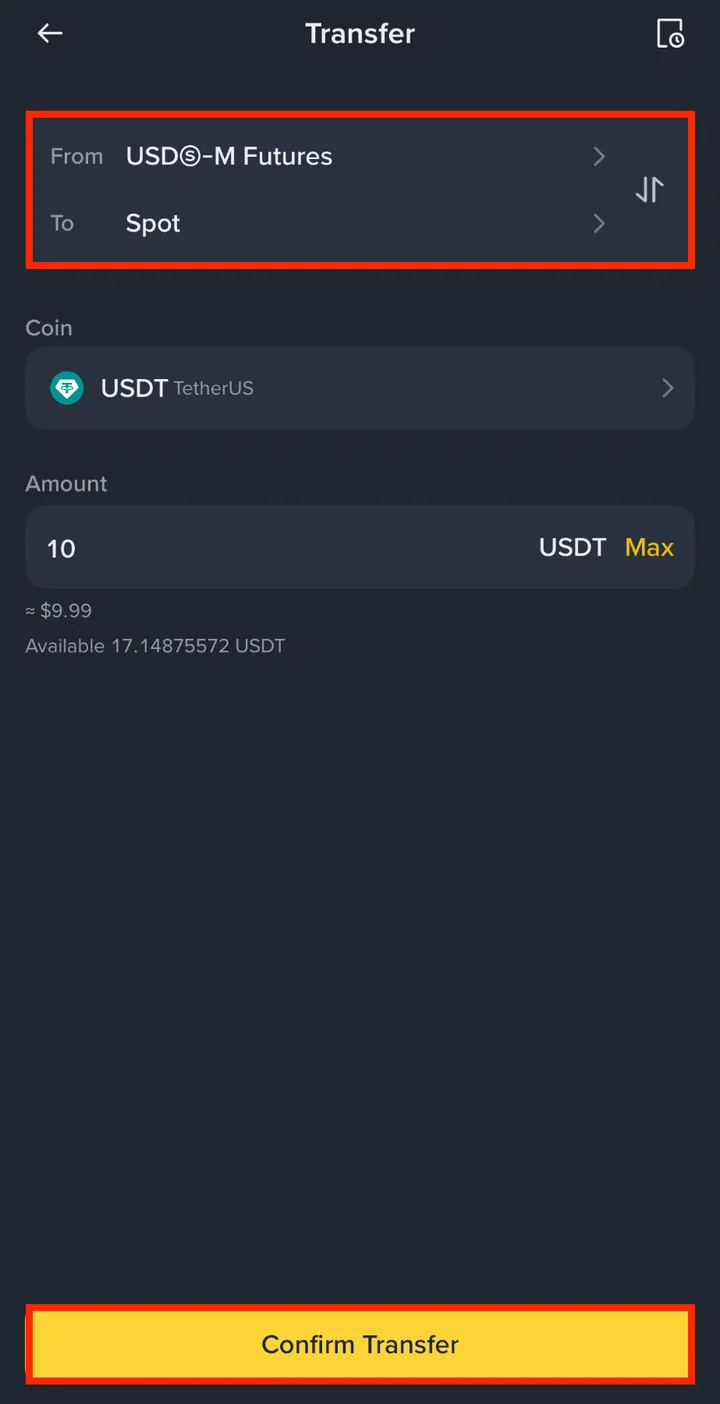
Set From to USDⓈ-M Futures and To to Spot. If they show the other way round, tap the ⇅ icon on the right of the box to swap them. Enter the amount and tap Confirm Transfer. Check the two lines carefully before you confirm.
Transfer Successful appears with the amount. Tap Ok.
▣ If you can't move back your whole Futures balance
Binance lets you move back the available amount, shown as Available for Transfer under each coin on the Futures tab (see the screenshot for STEP 7 in section 2).
3-2. Check your transfer history
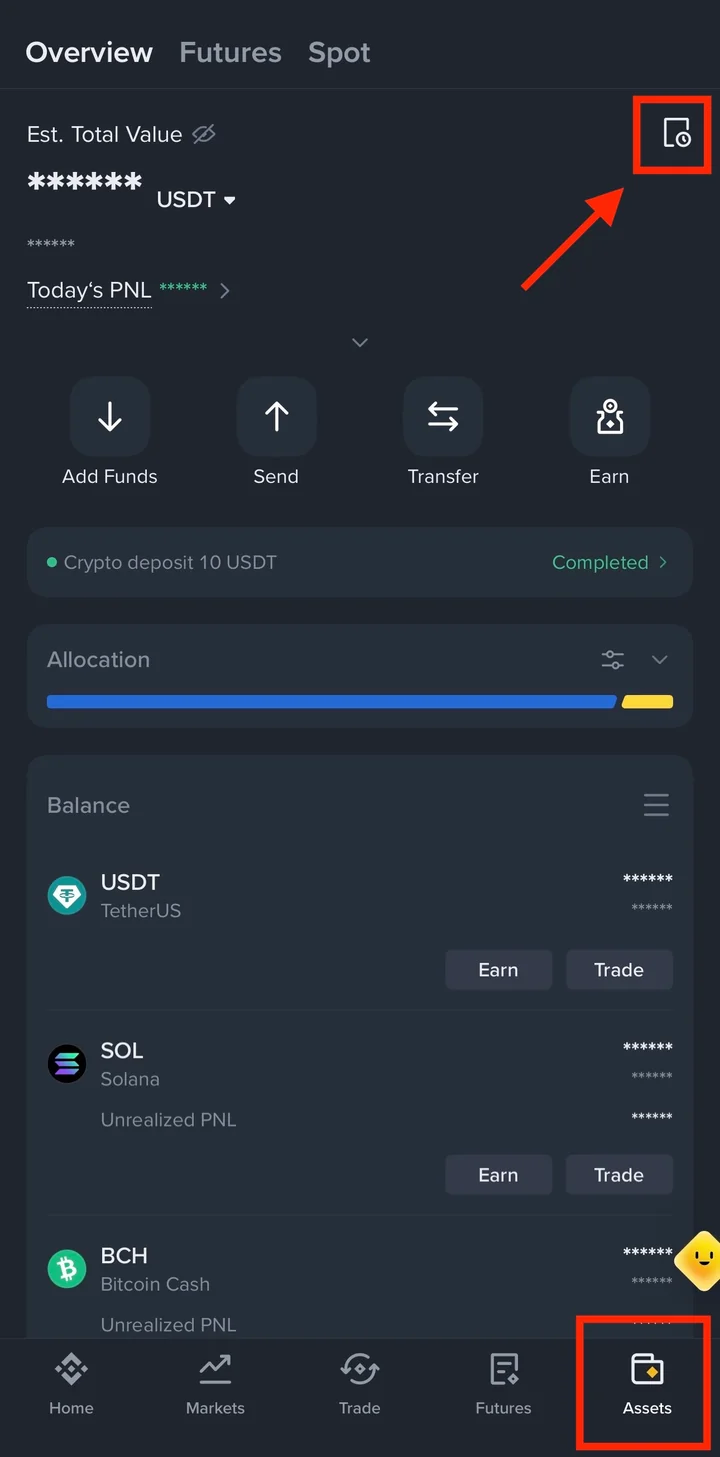
In Assets, tap the history icon at the top right.
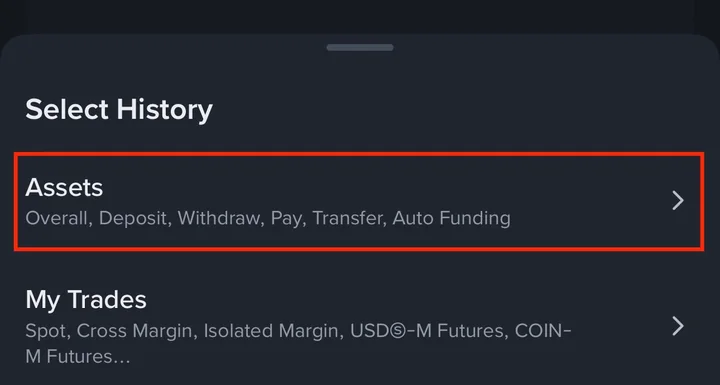
In Select History, tap Assets. Its list includes Transfer as well as deposits and withdrawals, so your spot to futures transfer is recorded there.
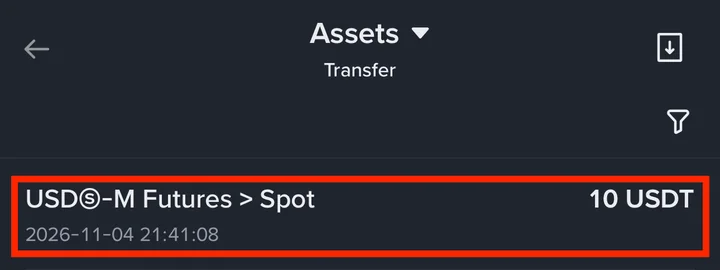
Find the Transfer entry. It shows the amount, the date and time, and the direction. The move in section 2 shows as Spot > USDⓈ-M Futures.
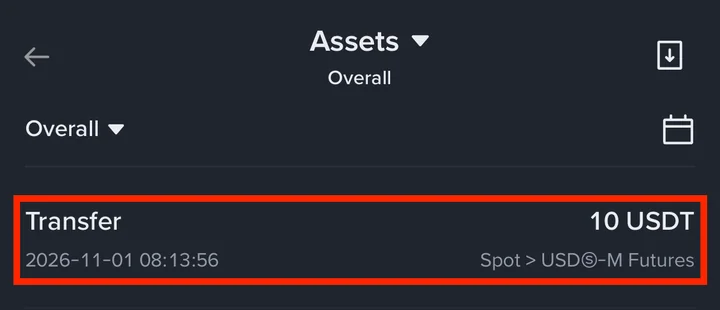
A transfer back (3-1 in section 3) shows the other way round, as USDⓈ-M Futures > Spot.
3-3. Take the Futures quiz before your first trade
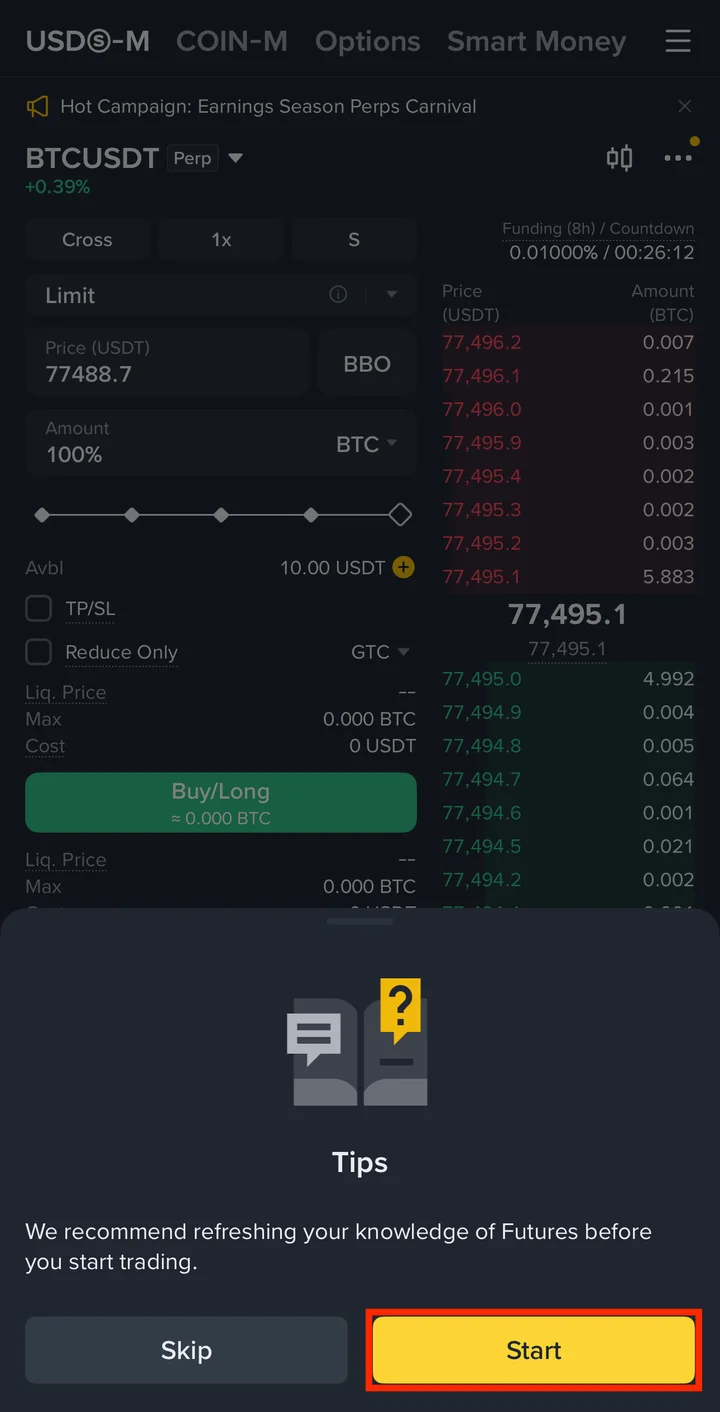
When I opened the futures trading screen after this transfer, Binance showed me its Futures quiz. It has 14 questions, and you need every answer right to start trading futures.
A Tips message recommends refreshing your futures knowledge before you start trading. Tap Start.
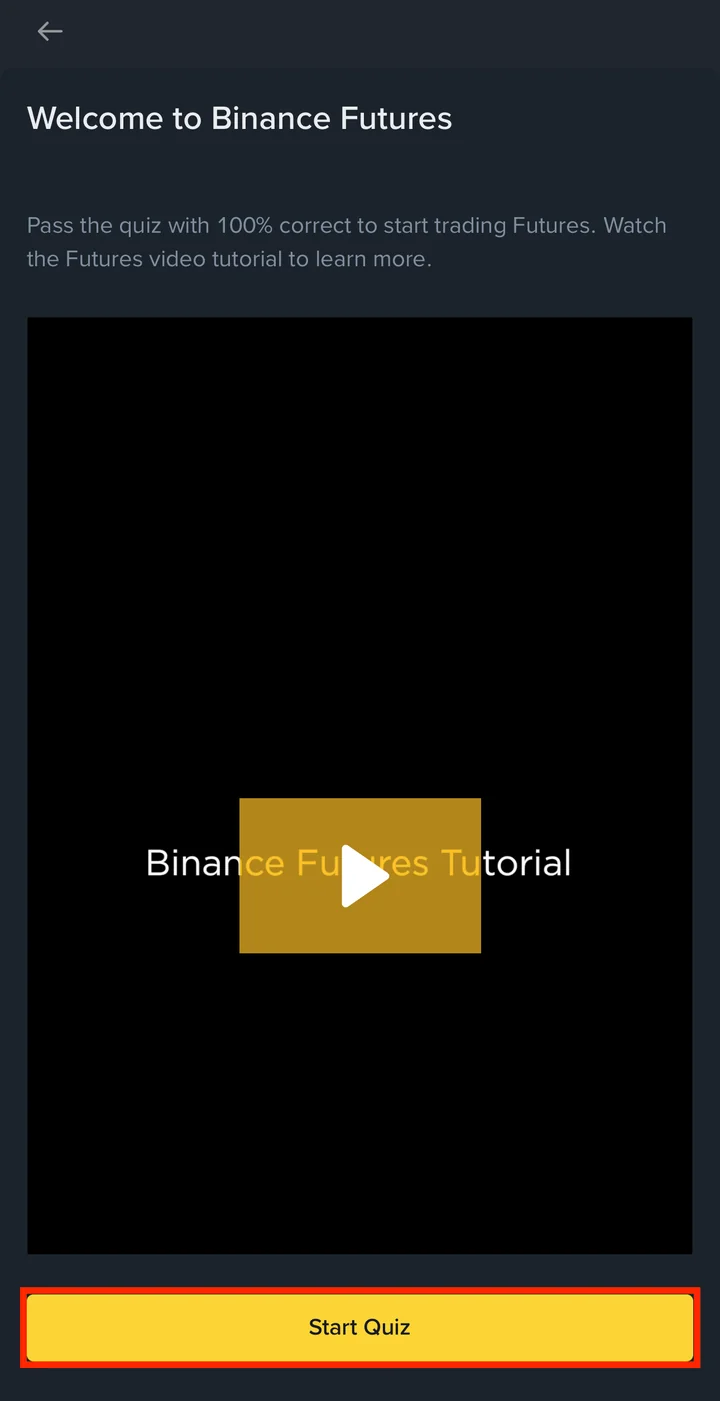
The Welcome to Binance Futures screen asks you to pass the quiz with 100% correct answers. You can play the Binance Futures Tutorial video first if you like. Then tap Start Quiz.
Choose an answer and tap Next. The first question shows you how it works: a tip above the button says Submit your answer, so you tap Next yourself this one time.
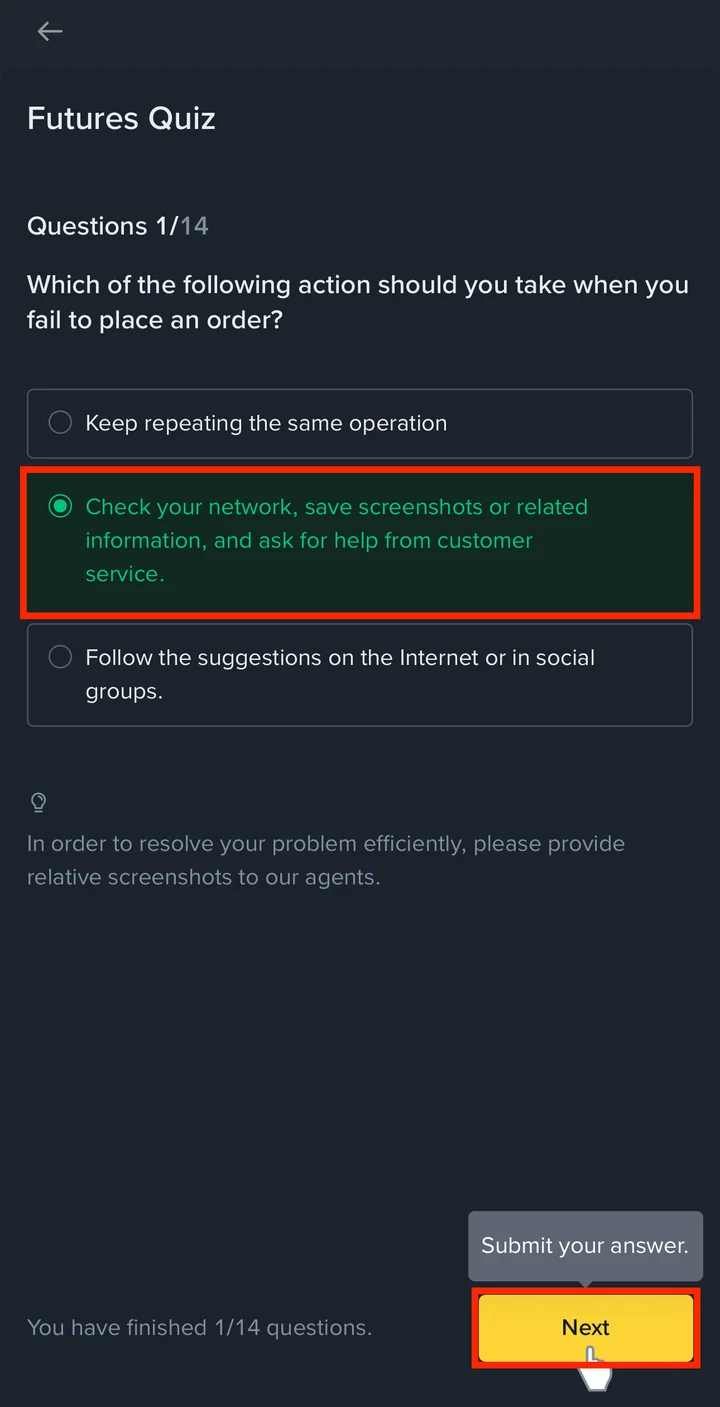
If you choose a wrong answer, it turns red and the right one shows in green. Select the green answer and tap Next.
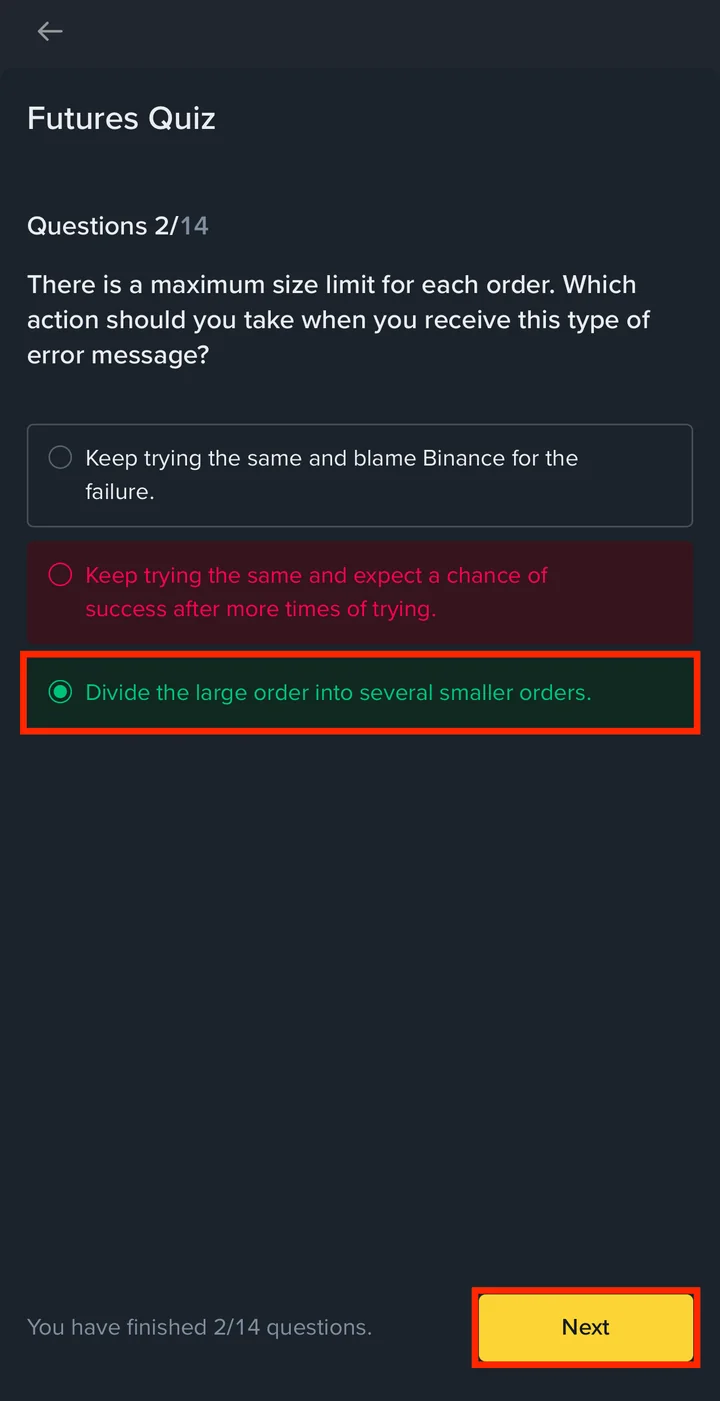
You don't need to worry about the quiz. After the first question, a right answer took me straight to the next one with a Correct message. When I picked a wrong one, the right answer showed in green, so I only had to select it and tap Next. On the last question, the button says Submit instead.
The questions I saw covered failed orders, order size limits, stop orders, profit and loss, the most you can lose, liquidation and fees. The last two asked me to agree to Binance's terms on service problems.
3-4. Check Cross or Isolated before you trade
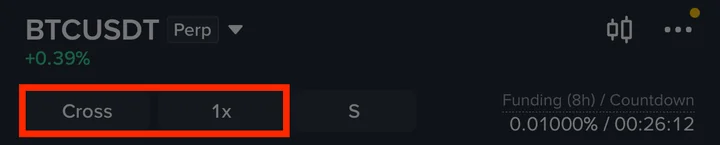
Before I place a futures order, I always check whether the margin mode is Cross or Isolated. It's the button at the top left of the order panel, with the leverage right next to it.
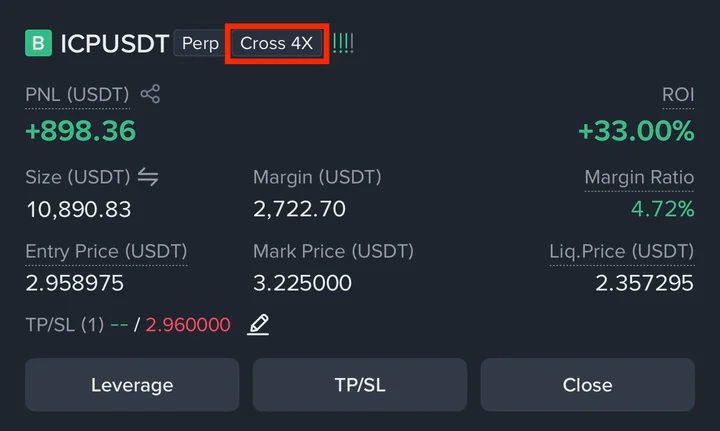
After the order fills, check it once more on the position card. The mode and leverage sit next to the symbol: Cross 4X in this screenshot. The card also shows the Liq.Price, the price at which Binance would liquidate the position.
Binance sets every contract to Cross by default. In Cross mode, your margin is shared across your open positions, and one of the quiz questions explains that everything in your Futures wallet then counts as margin and can be lost if a position is liquidated. Isolated mode keeps a separate margin for each position, so the risk stays with the margin you put into that position (How to switch between Cross and Isolated).
Three more checks before you trade:
Set the margin mode (Cross or Isolated) before you order. Binance doesn't let you change it while you have open orders or positions, and the setting applies only to the contract you select.
Check the leverage next to it. The higher the leverage, the smaller the price move it takes to reach liquidation.
Move back what you don't use. In Cross mode, USDT left in Futures still counts as margin, so move unused USDT back to Spot (see 3-1 in section 3, Move USDT back from Futures to Spot).
4. Binance spot to futures transfer FAQ
Does it cost anything to move USDT between my own wallets?
No. Moving USDT between your own wallets is free.
My USDT is in the Funding wallet, not Spot. What do I do?
Binance says money you receive through P2P, Pay, gift cards or Pool goes to the Funding wallet. On the Transfer screen, tap the From line and choose Funding instead of Spot.
Can I do this on the Binance website instead of the app?
Yes. Binance's steps for the website are Assets → Overview → Transfer: choose the two wallets and the coin, enter the amount and click Confirm. (Binance wallet guide)
Do I have to move all my USDT to Futures?
No. You type the amount yourself, and whatever you don't move stays in Spot. I move only what I plan to use for the trade (STEP 5 in section 2).
That's it: your USDT is in your Futures wallet. You also know how to move it back, where to find the record and what to check before your first trade. If you'd like to make your account more secure, the next guide covers two-factor authentication (2FA) with an authenticator app.
Well done!